I recently came across a wonderful blog post by English language teacher Chiew Pang. Chiew is a famous blogger in the international English language teaching community. He interviews teachers and shares lots of great resources. His recent post "Know your photos; know your camera" on the ELTPics blog was full of great tips and ideas for teachers. I asked him to rewrite it for English learners so that I could share it with all of you. I was so happy that he agreed! If there's one thing I've learned in life, it's this: It doesn't hurt to ask! I hope all of you will invite a guest blogger to your blog this month. (Check out: How to invite a guest blogger to your blog.)
How to Make the Most of Your Compact Camera by Chiew Pang
First of all, there's nothing wrong with a point-and-shoot. Try to learn its strengths and weaknesses and use your eyes and imagination. A great photographer can produce sensational shots with a basic camera, but the best camera money can buy won't guarantee you a sensational photo. Remember that it's the carpenter, not the tool.
The next thing you do is to take out the manual and have another read. Learn the names of the parts of your camera. Know its features. Apart from the physical parts of the camera, know what these following important words mean:
aperture(also known as f-stop): this controls the amount of light entering through the lens. Note that a small f-number means a bigger opening, allowing more light to enter. It usually has an 'f' displayed before a number, e.g. f2.8, f16. Generally, when you shoot in bright light, the lens will need less light, so the camera reduces the opening, for example f11, f16 or even f22. The opposite happens when there isn't enough light: the camera increases the aperture, for example, f2.8 (more light enters).
depth of field: this refers to the range between the nearest and the farthest object in sharp focus. Generally speaking, you'll want the greatest depth in a landscape shot, but the opposite on a portrait. The other important thing to remember is that the higher the f-number the more depth of detail you will get.
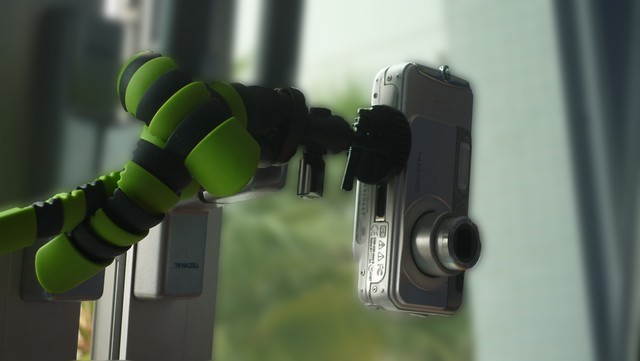
exposure (or shutter speed): this is the amount of time the aperture remains open. Although most cameras now have image stabilization features, using speeds of less than 1/60th of a second may produce blurry shots. In these cases, use a tripod if you have one; otherwise, support your camera on a steady surface. You can get a mini-tripod cheaply, and they're fabulous!
ISO: International Standards Organization. A low value means that the "film" is less sensitive to light (= needs more light) but it also gives the best quality, for example ISO 64. A higher value means the opposite.
JPG or JPEG: this is the file format most of you are familiar with, and, unfortunately, is the only type most point-and-shoot will allow you to save your photos in. Just remember that it is a lossy format, meaning it's compressed and each time you save the file, some detail will be lost. So, avoid editing edited pictures. Use the original wherever possible.
RAW is a lossless format.
Megapixels: This is the number of pixels a digital camera can record. 1 megapixel = 1 million pixels. Contrary to popular belief, greater does not always mean better.
Know your camera
So, how would knowing these terms help you shoot better photos with your little automatic camera? Well, first of all, even fully automatic cameras do give you a certain amount of control. You can probably control the ISO, you can compensate the exposure, and you can use the "scene" modes, where the camera adjusts the aperture/speed according to the scene you choose, for example, beach, candlelight, or portrait.
Don't shake!
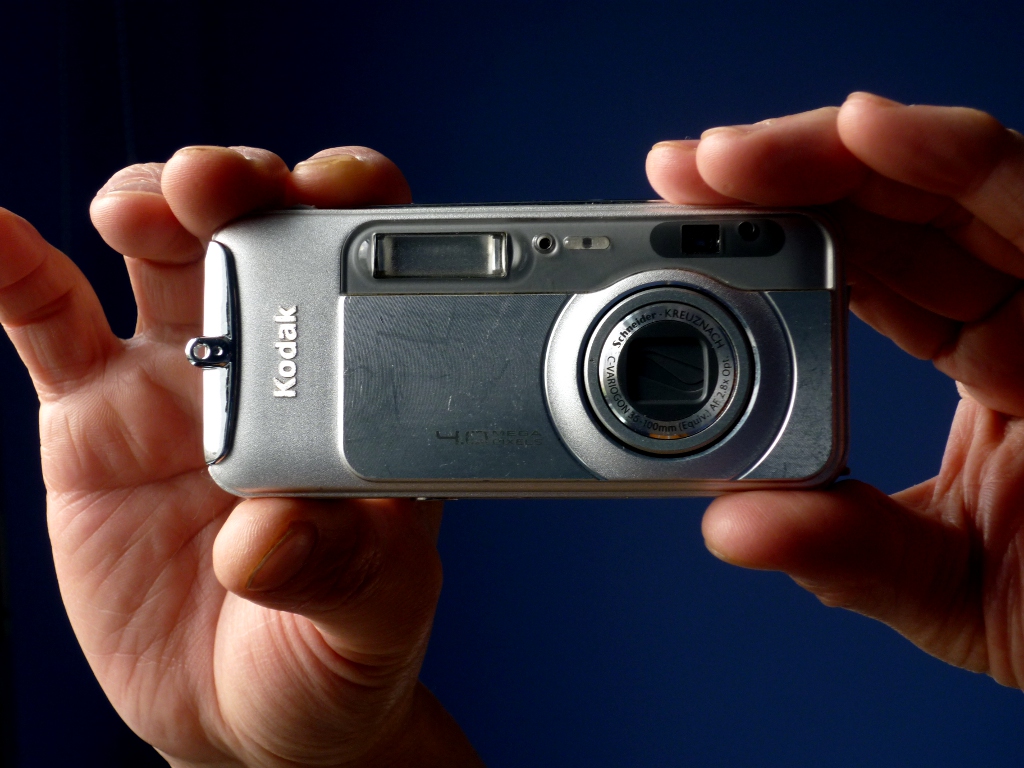
Get into the habit of holding your camera with both hands (see photos below). Make sure your body is stable: stand with legs slightly apart, feet flat on the ground, not on tiptoes! If doing frog's eye (see below), lie down flat, supporting your hands on both elbows. You can also put the camera on the floor. If you want to be on a squatting level, go down on one knee, or sit down.
The right way

The wrong way
Distance from the subject
Your camera is likely to be equipped with both optical and digital zoom. Avoid digital zoom. If you can move closer physically, do it. When doing close-ups using macro mode, use a tripod, if possible, and learn to use the self timer. Pressing the shutter manually usually involves a little shake.
Angle and level
This is one aspect of photography a lot of casual photographers ignore. Most people snap their photos from a standing position. They use three angles: up, down and straight.
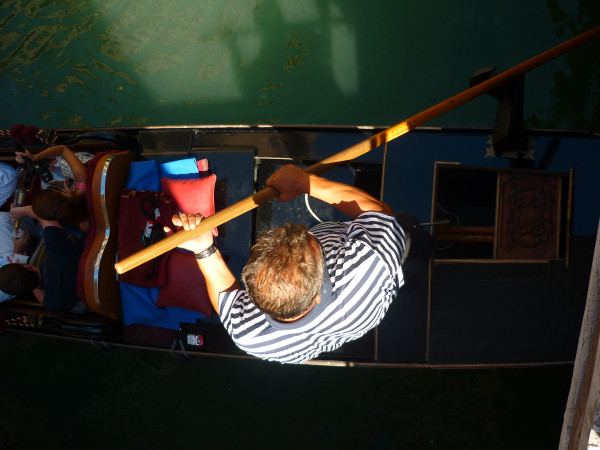
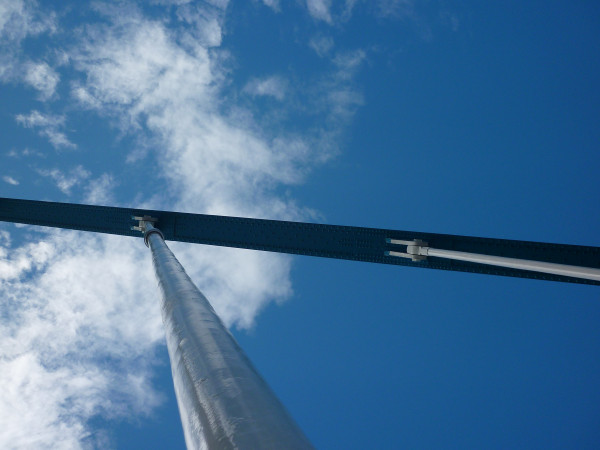
Apart from the angles, the level you shoot from can make a big difference to your photo. The three basic levels are bird's eye (overhead shot), eye-level (straight ahead) and frog's eye (low). Try taking a shot using all angles and levels of the same subject, and see the difference! Or walk around one day and shoot everything from one level, such as frog's eye.
Bird's Eye
Frog's Eye
Frog's eye, looking level
Focus
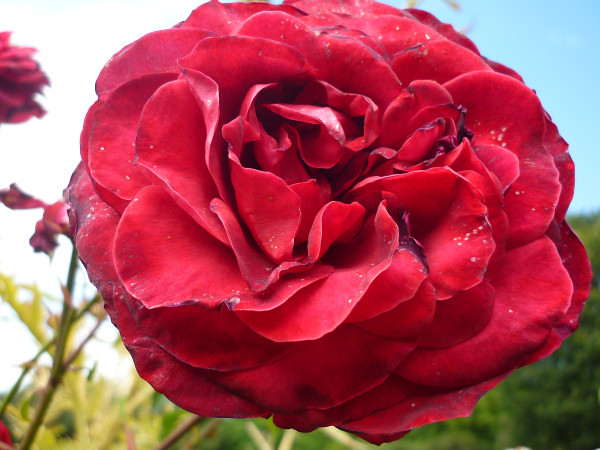
This isn't so simple with fully automatic cameras. If you're shooting portraits or close-ups, the idea is to have the subject in sharp focus, and the rest in soft focus. The following photo was taken at 1/320s with an f-stop of 2.8, ISO-80. Notice that the rose remains in focus while the background, in contrast, is a little softer. It's important to focus on the subject, and click on the shutter gently. If the subject isn't in the centre of your frame, you'd still need to focus on it, press gently, but without going all the way. The camera will register the optimum settings. Without letting your finger go, re-frame the shot the way you want, and now, click the shutter all the way.
Framing
Try to frame the photo in your mind before clicking. Are you interested in the background, or just the main subject? Or is there something even more interesting about the subject, such as the ring on her finger, or the tattoo on her neck? Move closer, or farther. Turn more to the left, or to the right. Angle upwards, or downwards. Which format suits better: portrait or landscape? Think about shapes and spaces. Look behind the subject: would he look like he had a tree growing from his head? Try to keep your photos "clean" and "tidy".
Lighting
Where's the light? Is the subject squinting? At the same time, remember that with the light behind your back, the subject's face will be clearer. If the light is behind the subject, it makes its form more noticeable.
Shooting subjects from behind can sometimes be very interesting. Observe shadows, play around with contrasts. If you want your main subject to appear darker, focus on a brighter area, press the shutter gently to get the settings before re-framing and clicking all the way (see Focus above).
The best time for day shoots are early morning and early evening, where the light is softer. The light offered by bright sunny days, contrary to popular belief, is just too harsh. Try stepping into shadows, or as I mentioned above, observe the contrasts.
I normally avoid using flash because the light is just too hard. If you wish to take photos in low-light conditions, use a tripod or rest the camera on a steady surface. Use the self timer.
In this image below, the camera was pointed to the sky first to get an exposure of 1/200s, f8.0; with these settings, the buildings and the tree appear as silhouettes against the brighter sky.
1/200s, f/8.0, ISO80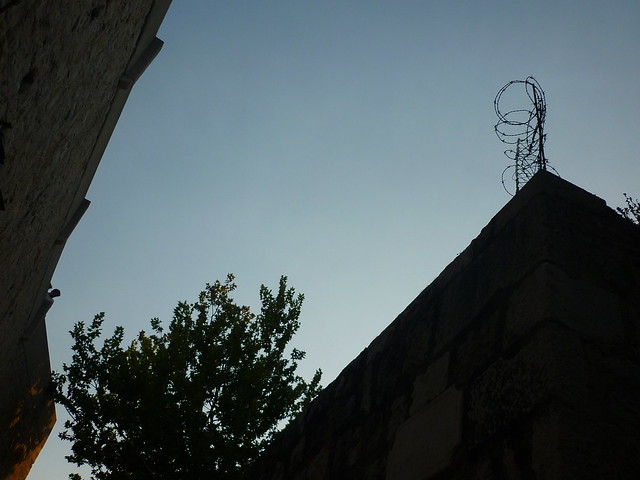
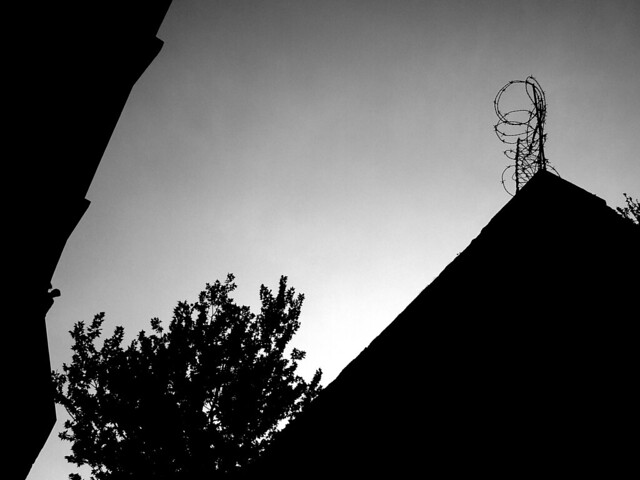
Try doing some black-and-whites for impact or nostalgia.
So, there you have it. You're now ready to be more adventurous and to take great shots with your point-and-clicks!
All the above photos were taken by myself using a Panasonic Lumix DMC-FS62, and, no, I wouldn't mind a Nikon D7000, thank you very much :-)
For more samples of my photos, look in Flickr.
More from Chiew
IASKU (interviews with teachers who dare to be different)
Follow @aClilToClimb on Twitter
Note: Teachers, please see the original ELTpics post "know your photos; know your camera". You'll find some great ideas on using ELTpics in the language classroom.
A previous guest post on Tara's blog: Chippie Gets Busted
Learner challenge: Let's work together to create a glossary for this post. Choose one word in bold and write a definition (in your own words). You could also take a frog's eye or bird's eye photo and upload it to the MyEC photo gallery. Share a link to your picture in the comments below.
Comments
Take a photo from child's eye view! I love that idea. I think we could learn a little about the world they live in if we spent a day doing this. For example, next time I go to the zoo I might try it. It would be fun to do in the supermarket as well. We could learn about how stores market to kids. :) I guess child's eye view is in between "frog's eye" and "bird's eye".
I wonder, the photos taken from low position.. like when squatting. They're like from kids eye? It could be like u could experience your childhood again, when looking such photo. At least some of such photos sometime, do feel, little nostalgic or something different...
I think, that next time when I go to photograph, I try to take some from child eye level...It would be great, if I could succeed so well, that people could feel like they're kids again, when seeing the photo...
It's difficult though, they probably would just end up something like from sheep eye, or smth.. Like this one with some flower and grass.. Or maybe this is actually rather through of honeybee eye, since too few crass, and too much flower for sheep. :P
Looks great to me! Beautiful shot!
I would love to see some more photo examples from all of the readers. Try one of the tips and share it in the MyEC gallery.
I am ashamed to say that I forgot these rules when I was taking pictures in Philadelphia this week. Here is the first picture I took. What could I have done to get a better shot through the airport window?
Thank you Tara and Chiew Pang. I learn a lot from your useful tips. I'll try it out.
Thank you very much Tara and Chiew Pang! I learned useful tips. Just like Grace, I like taking photos too! I learned new vocabularies and having the dictionary app is pretty much useful. : )
Dear Tara
invaluable tips thank you for sharing and making it more challenging and interesting
Thanks Tara, you always found something useful for our club!
Hi Tara, I took this challenge! Here is mine : Bird's Eyes - Catch My Shoes
Dear Tara, I've done one. Please take a look at here.
-
1
-
2
of 2 Next